
Introduction
We have integrated a color camera and a thermal camera in a wearable device. The compact camera device with an integrated battery and charging circuit is comfortable and intuitive to use. The goal of the device is to be used in all kinds of operations (e.g. search and rescue operations.)
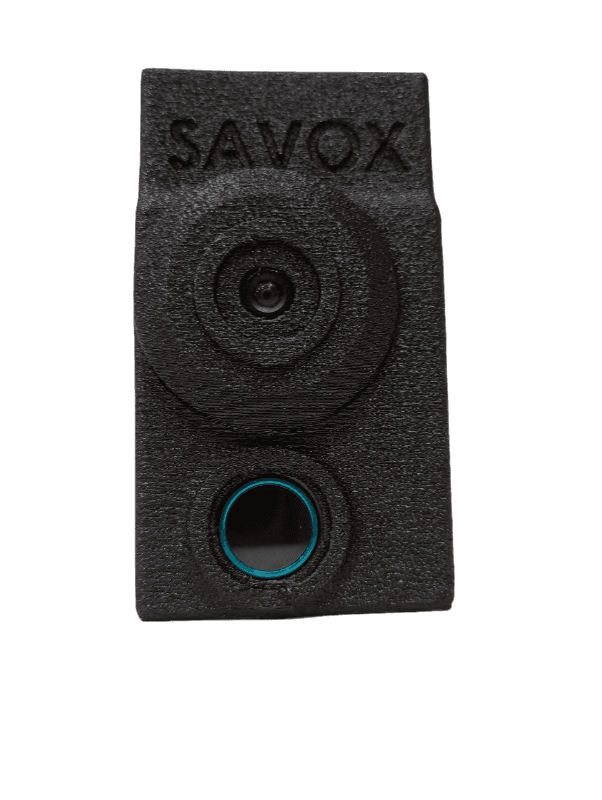
(Figure 1. Integrated device)
Hardware
For the thermal camera module we chose Infiray P2 Pro and alongside it we use Raspberry Pi Camera Module 3 to capture HD color footage.
To process the video feeds and send the data forward to the server, we are using Raspberry Pi Compute Module 4. The Compute Module has a great amount of processing power in compact size. It doesn’t have any external connectors for USB cables or wires, so we designed a custom carrier board PCB for it. The carrier board PCB is connected to the Compute Module with two 100pin hiroshe connectors.
The thermal camera module is connected to our PCB via USB C port. We have routed a differential pair data lines from the USB port to Compute Module 4 and carefully calculated the right 90 Ω +/- 15 % differential impendace. The HD camera is connected to our PCB with 22pin fpc connector, which is a typical solution in many Raspberry Pi boards.
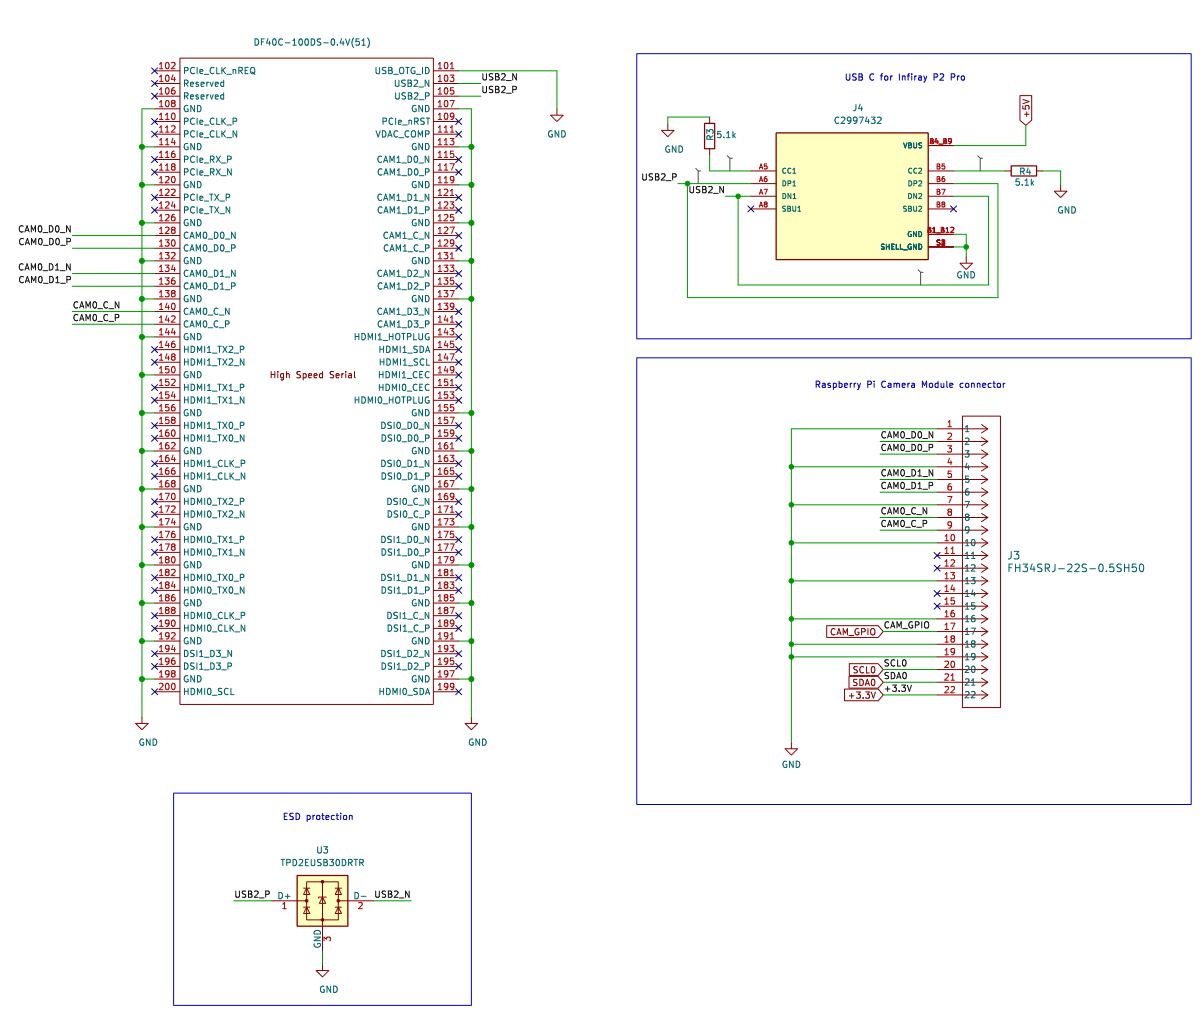
(Figure 2. Camera ports)
The device is designed to be wearable and wireless, so we have implemented a built-in charging circuit for 3.7v batteries. The PCB utilizes BQ25302 charge controller chip, which selects a suitable charging profile for the battery. The TPS61235 voltage regulator then steps up the voltage to 5v, that is required for the Compute Module.
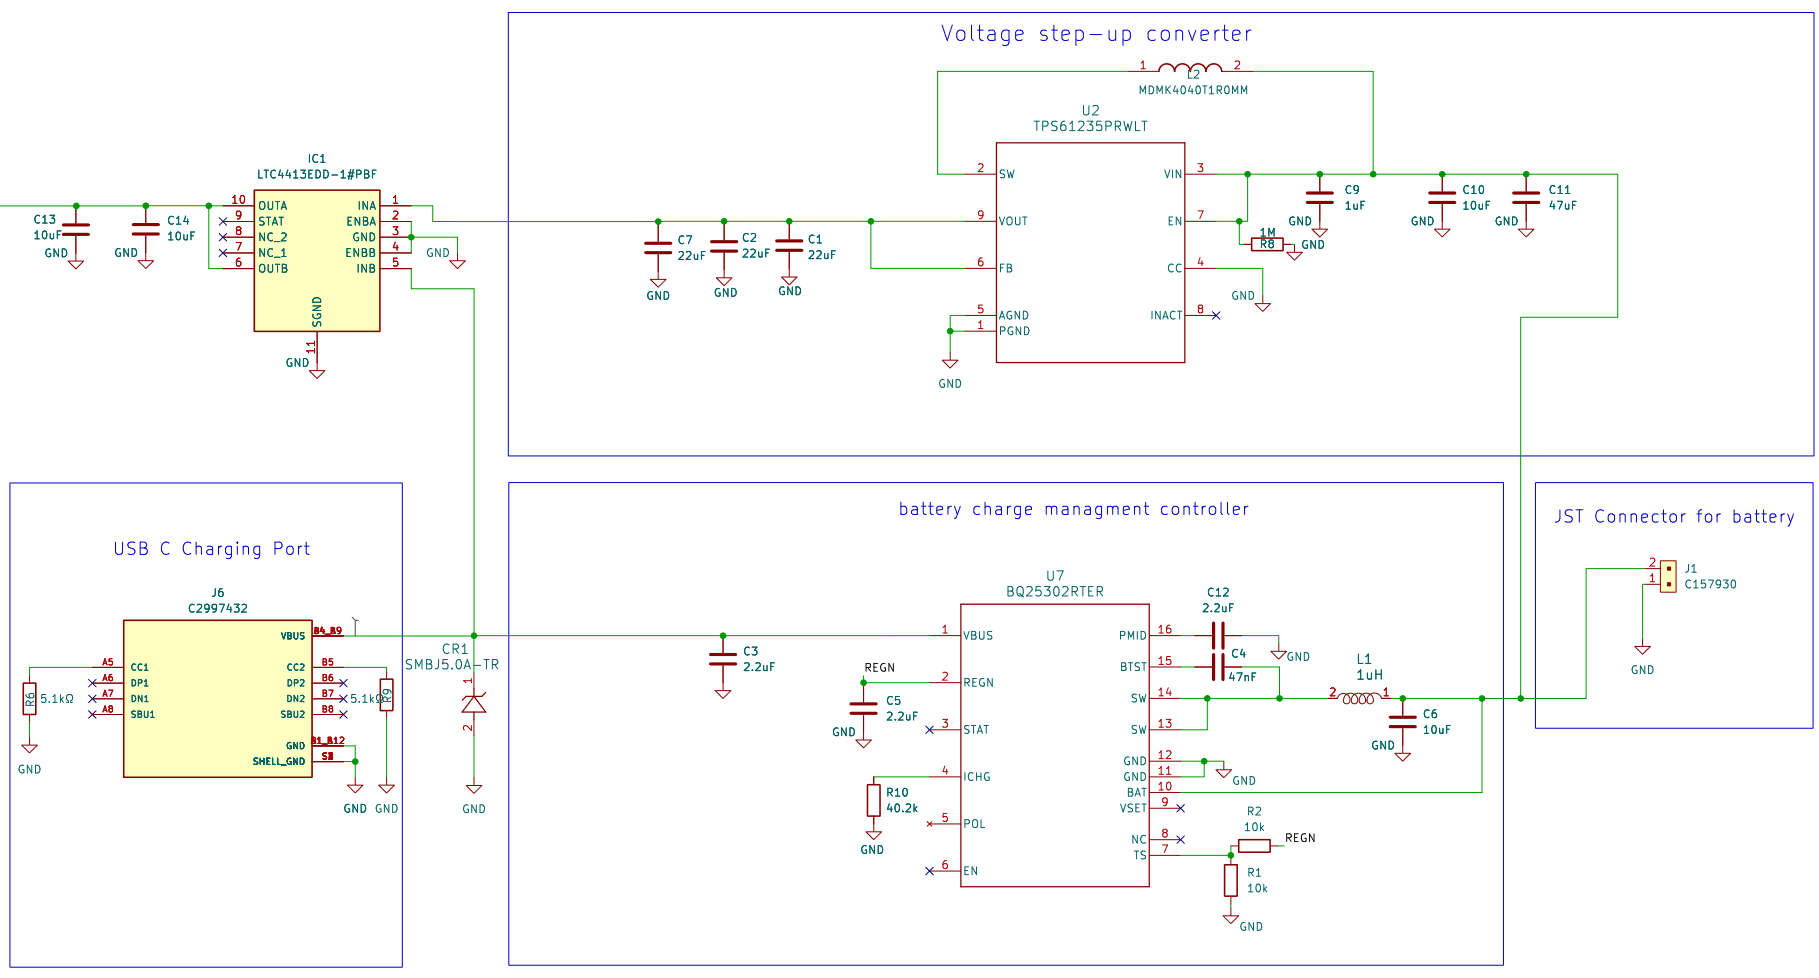
(Figure 3. Charging circuit schematic)
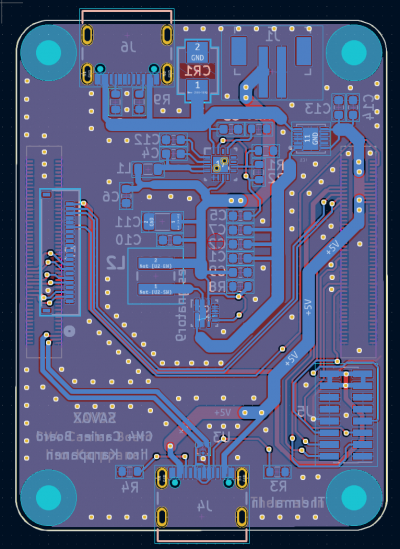
(Figure 4. Footprint of PCB)

(Figure 5. Components connected without an enclosure)
Device Software
We installed RaspOS Lite for the Compute Module 4, which is a light-weight operating system with no graphical interface. When the device is given power, it will automatically boot, connect to pre-configured WiFi, open an SSH connection and opens the camera feed uploading program.
The uploading program is written in Python and uses picamera2, opencv and websockets libraries. In each iteration of the program loop, the device reads camera feeds, formats the data into a binary byte array and sends it to the server through the WebSocket.
Server
We used the course staffs provided domain savox.protopaja.aalto.fi. We decided to use Nginx as the server provider for its convenience in managing connections and providing the website. It can easily be configured for TLS-encryption. The server software that is written in NodeJS.
The server also has a recording feature which we used to simulate multiple devices with pre-recorded footage. We created a Python program to send the recorded footage to the server which relays them to the clients with the same WebSocket connection that the live camera device uses.
Our device did not include a GPS sensor, so we simulated it with GPS Logger phone app. The mobile app creates occasional HTTP API requests to the server which parses the location data.
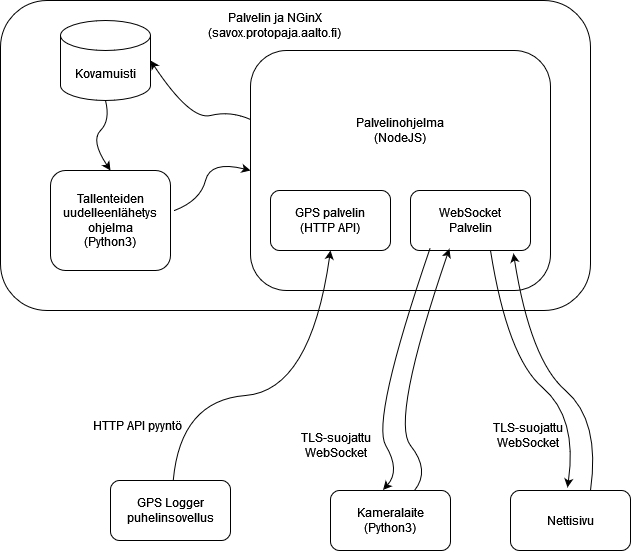
(Figure 6. Flow chart of data transfer)
Website
We created an web interface to conveniently see all the camera feeds. The websites includes a map feature, so with the addition of GPS data we can locate cameras in a street view. The website opens a WebSocket connection to the server to receive the camera feeds and GPS data for each device. The website is written in NodeJS, HTML and CSS.
The map uses the mapboxgl library and can be configured with our settings menu. When you hover on a camera marker on the map, it will create a preview pop up for the camera feeds. You can click the camera marker to see it in full resolution or select a camera from a camera selection menu.
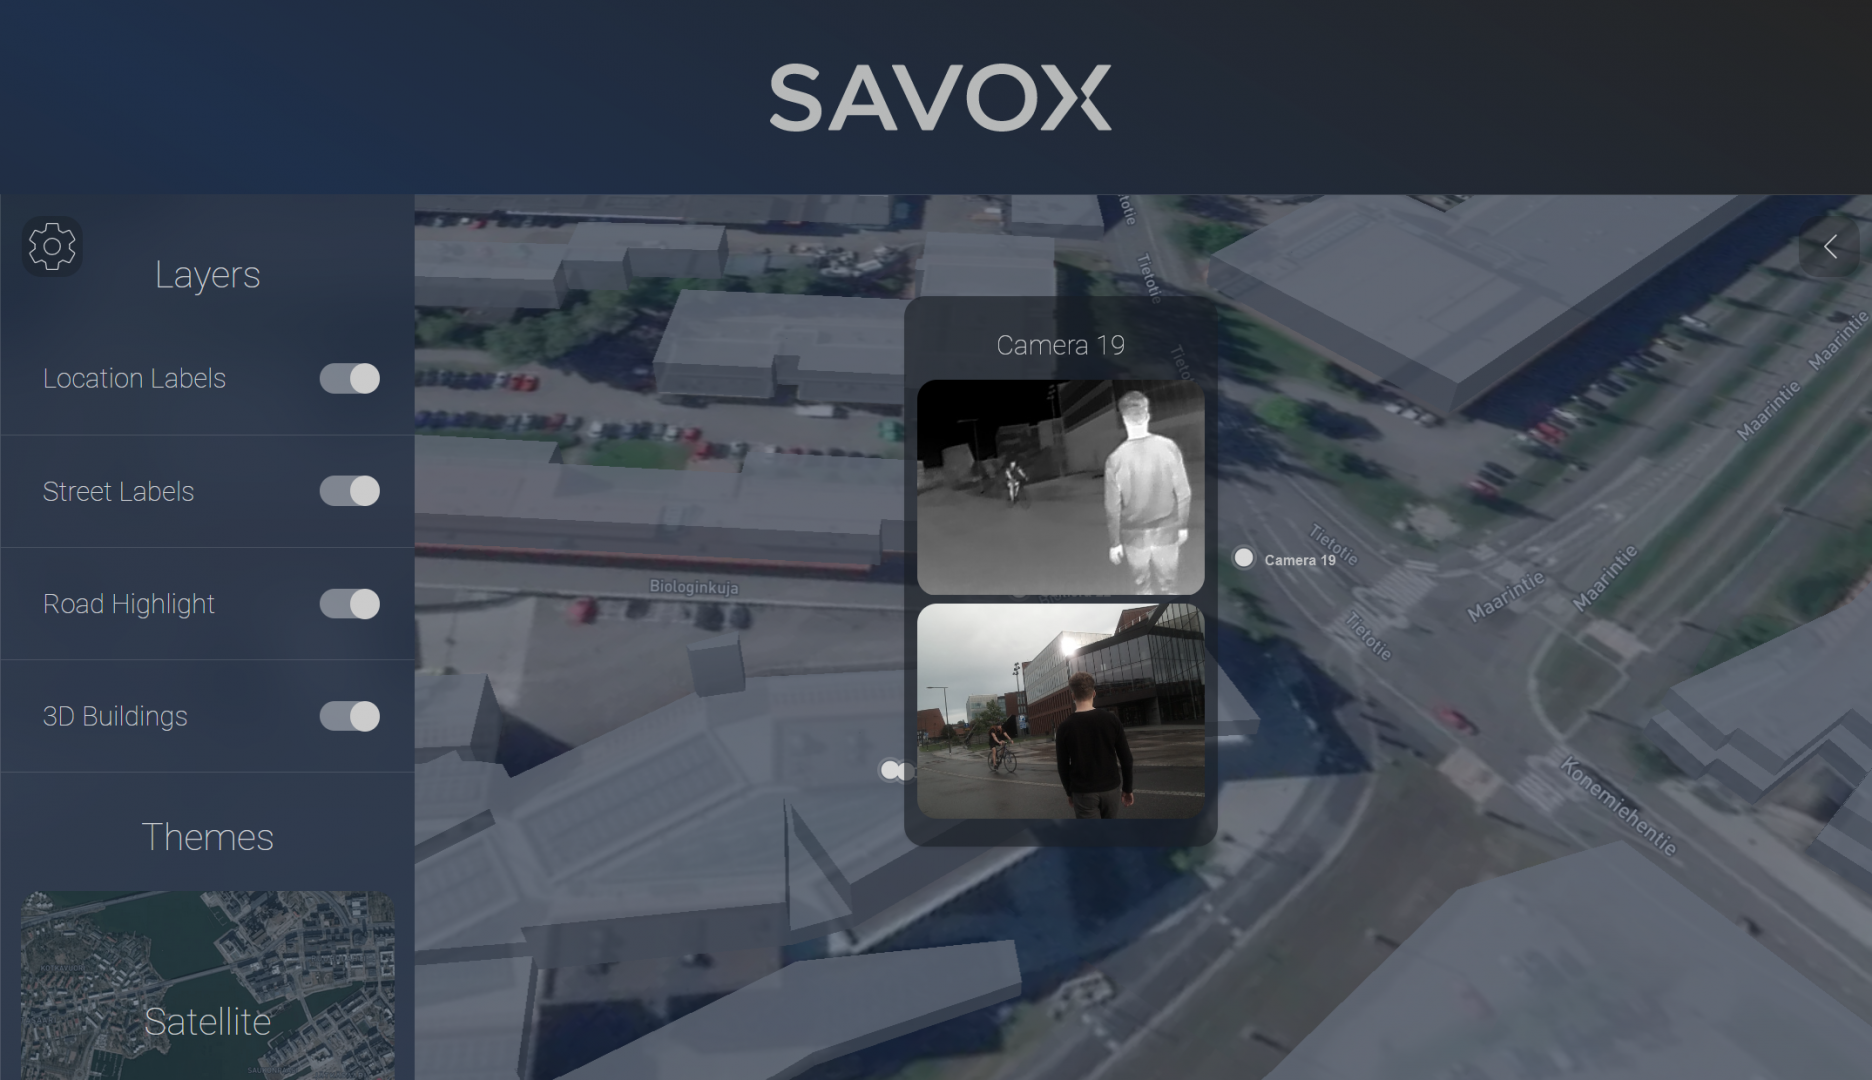
(Figure 7. Snapshot of the website map feature)
Files
Final report: savox2023_final_report.pdf
Download all files: protopaja_savox_2023.zip
(You may need to use 7-zip to extract)
Links
Device software: https://version.aalto.fi/gitlab/toikkah2/savox-device-client
PCB schematics: https://version.aalto.fi/gitlab/karppai1/savox-pcb
Server and client software: https://version.aalto.fi/gitlab/toikkah2/savox-server
Models: https://version.aalto.fi/gitlab/toikkah2/savox-models
License: MIT License
Team
Henrik Toikka (ELEC, Robotics and Automation)
Iiro Karppanen (ELEC, Electronics and Electrical Engineering)